Setup - External Manufacturing for Naviceram
Dependencies
For the correct use of the extension the following iDynamics products are required:
- iDynamics Printing Documents
- iDynamics Valued Shipment
- Naviceram
- License Management
Complementary iDynamics products:
- iDynamcis Credit Insurance
General setup
For the correct functioning of the application, the first thing to do is to install and configure Naviceram. To do this, see https://docs.aitanaoncloud.com/es/naviceram/index.html and install the application (there is a configuration wizard that can help you to configure the module easily). Once the installation and configuration of the mentioned module has been carried out, it is possible to start the External Manufacturing setup
External Manufacturing for Naviceram Setup
Locations' setup
Because this module will be used to carry out transfer orders, the first thing to do is to configure the different locations required for this purpose.

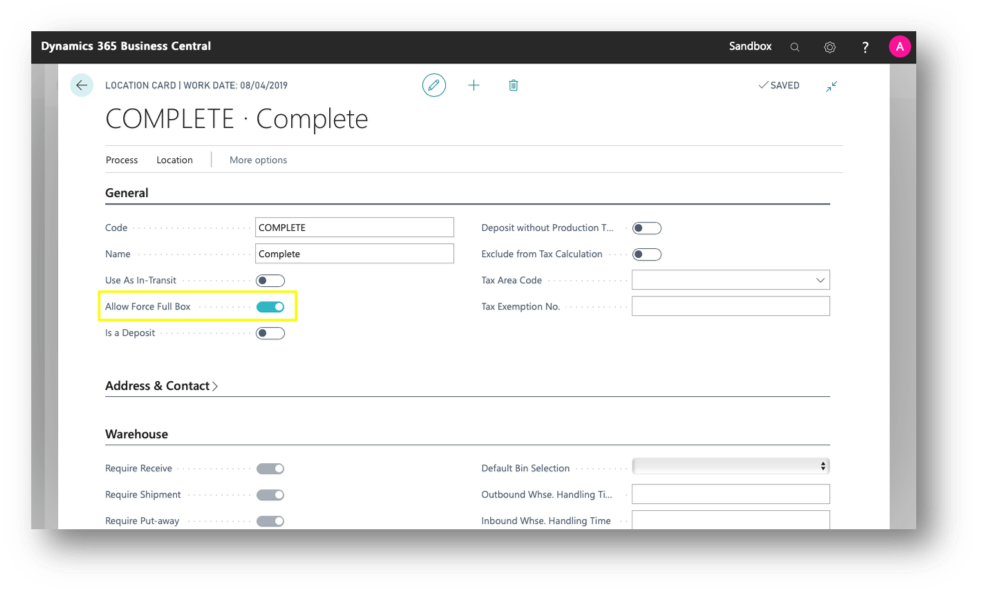
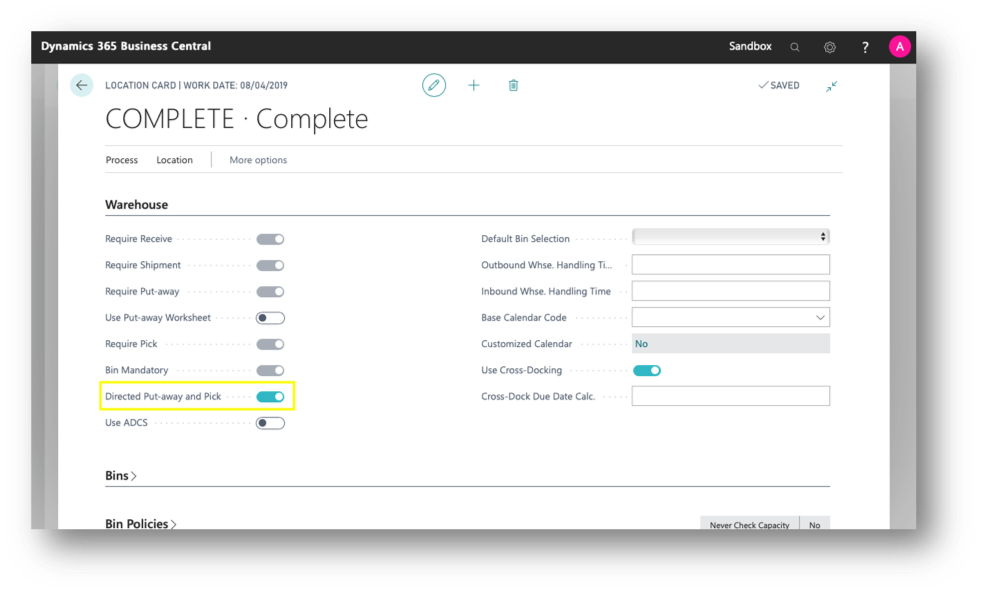
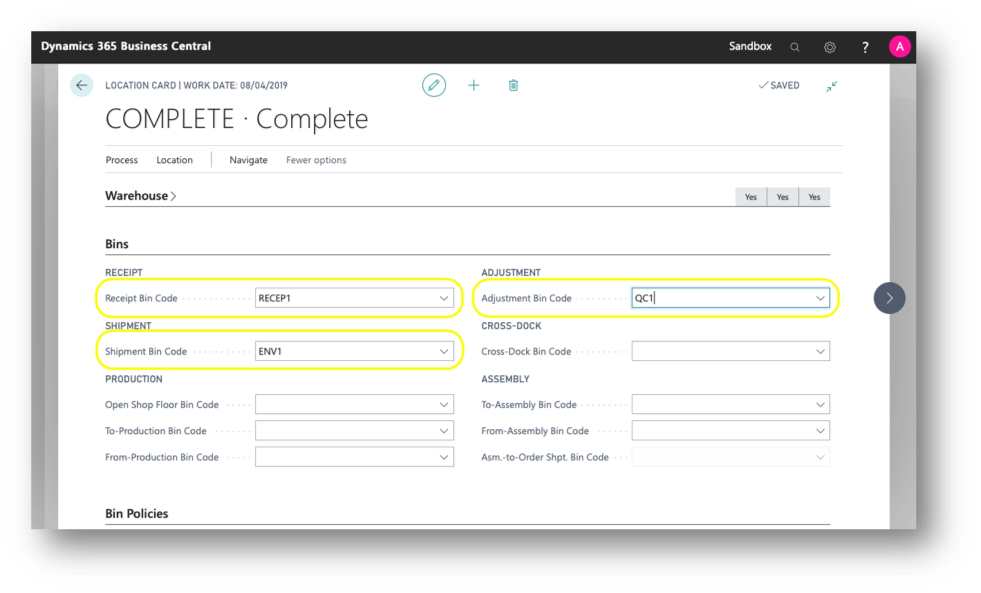
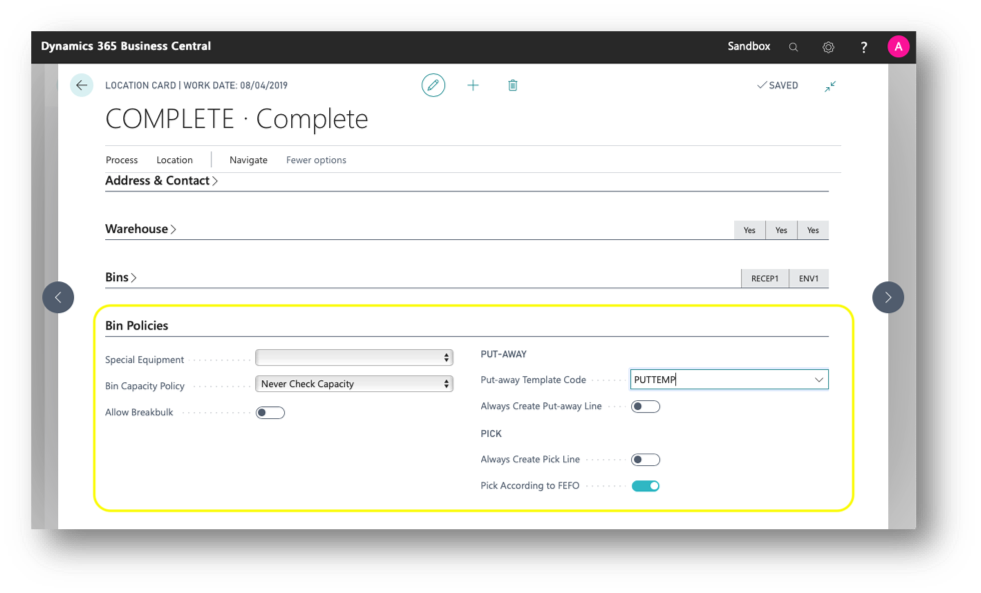
One of the locations we have to configure is the one from which the products will come out. The requested parameters for this locations to work are the following:
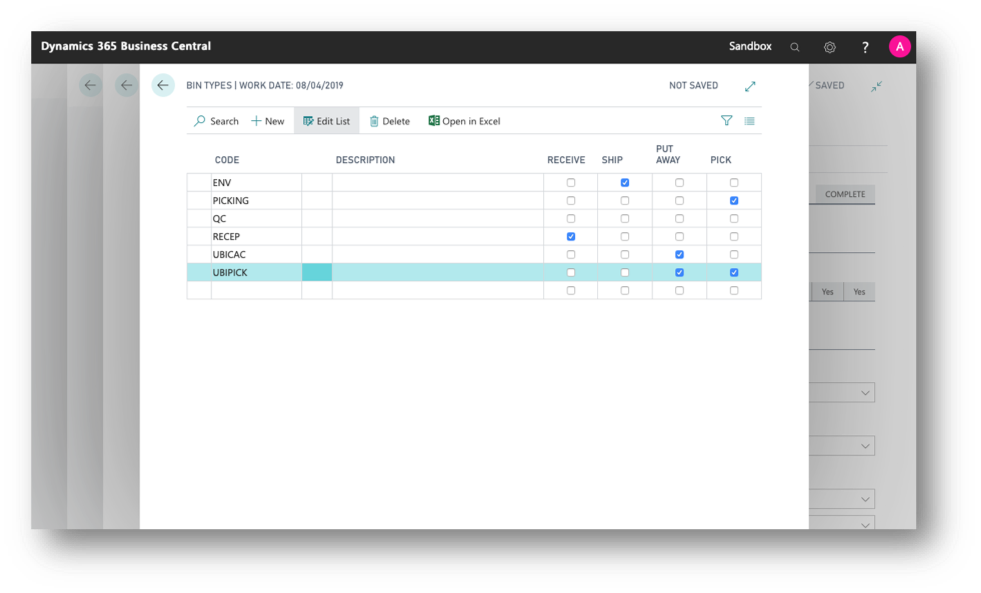
Configure the bin types of the locations:
Going back to the location card:
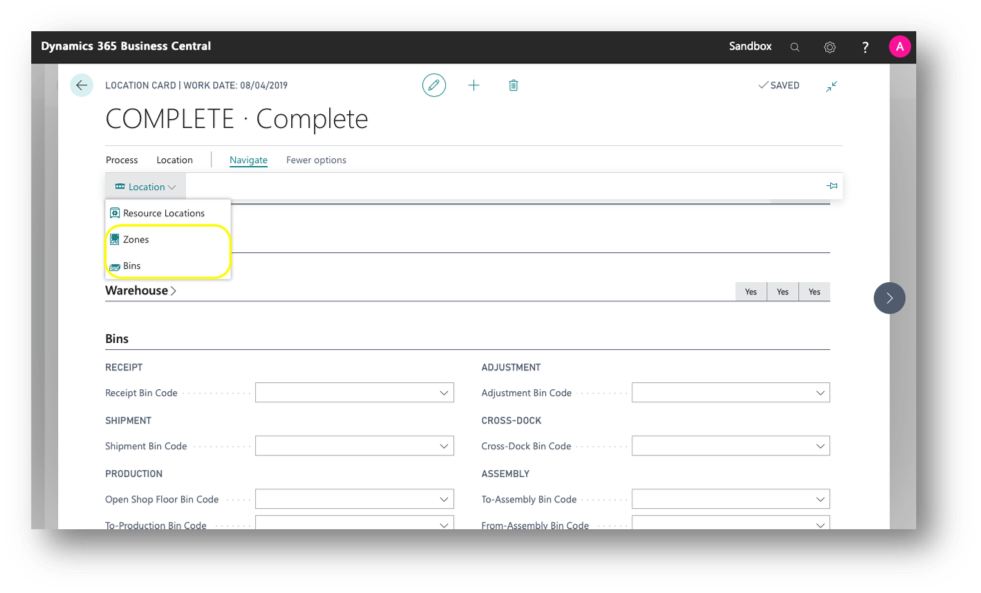
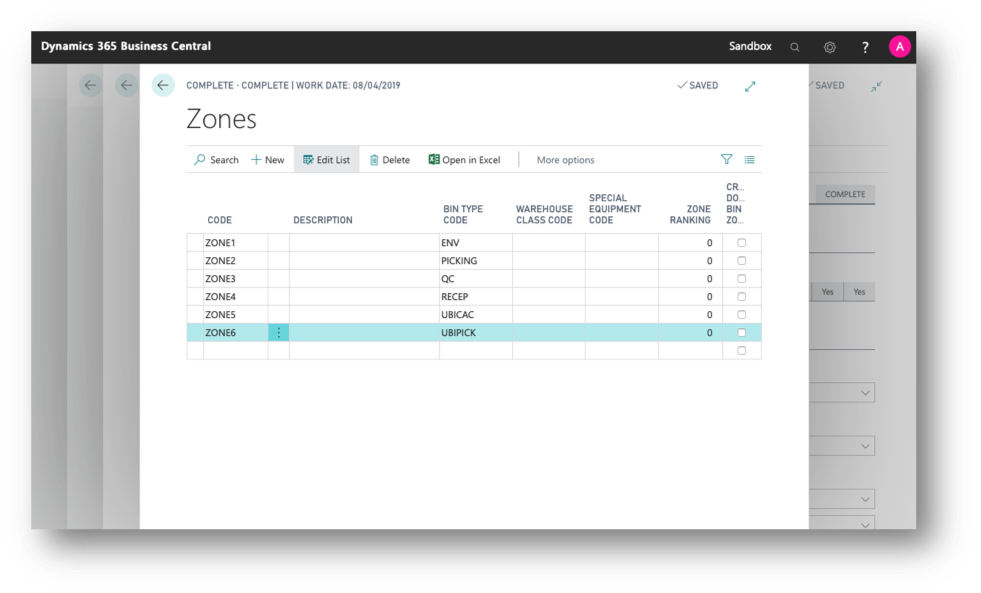
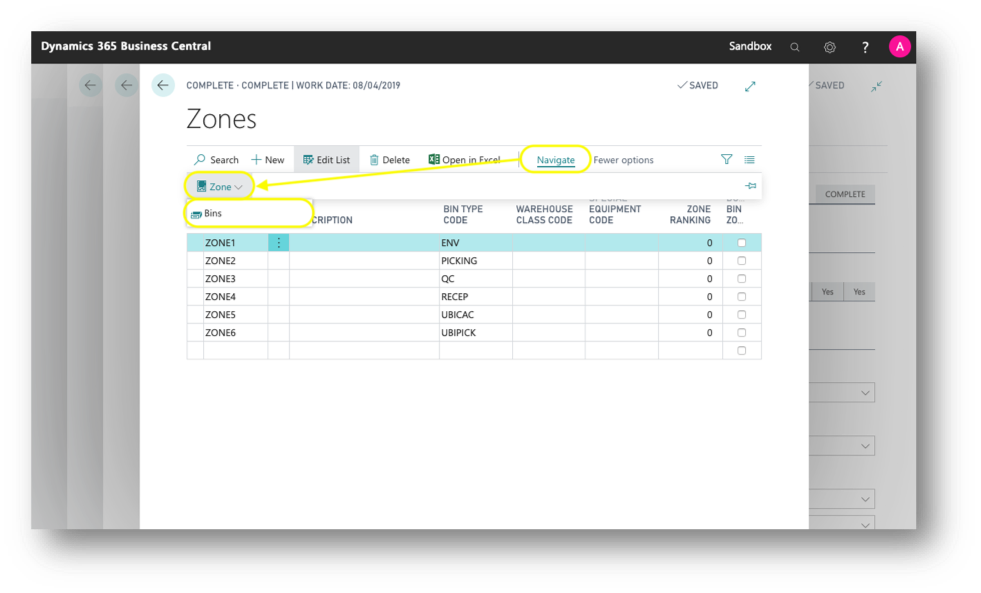
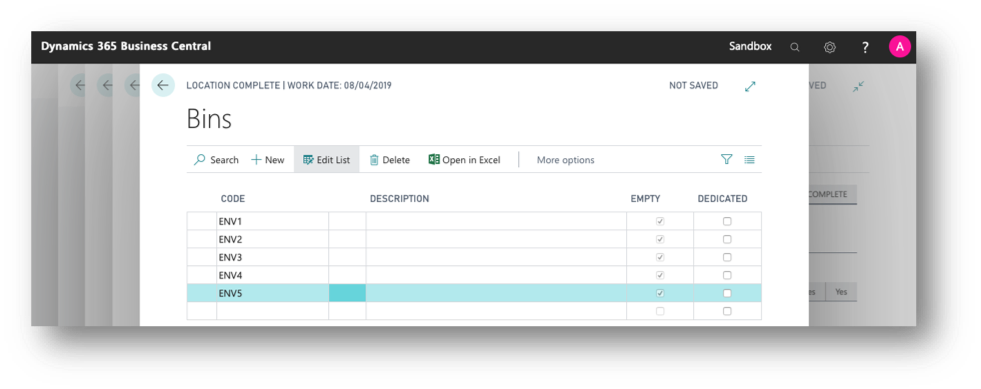
For each zone, navigate to create the bins associated to it:
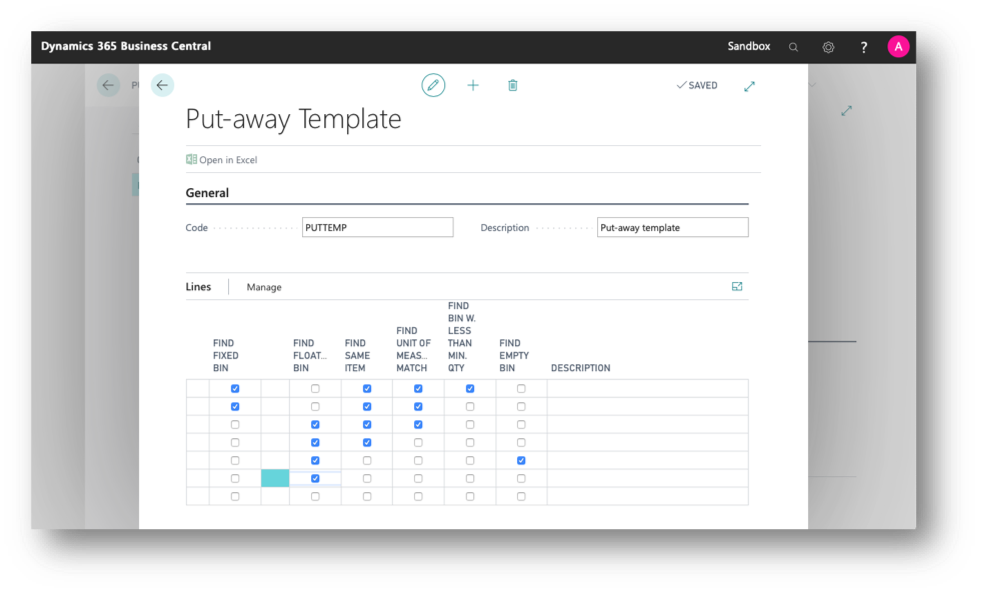
Before finishing with this page, create the put-away template as follows:
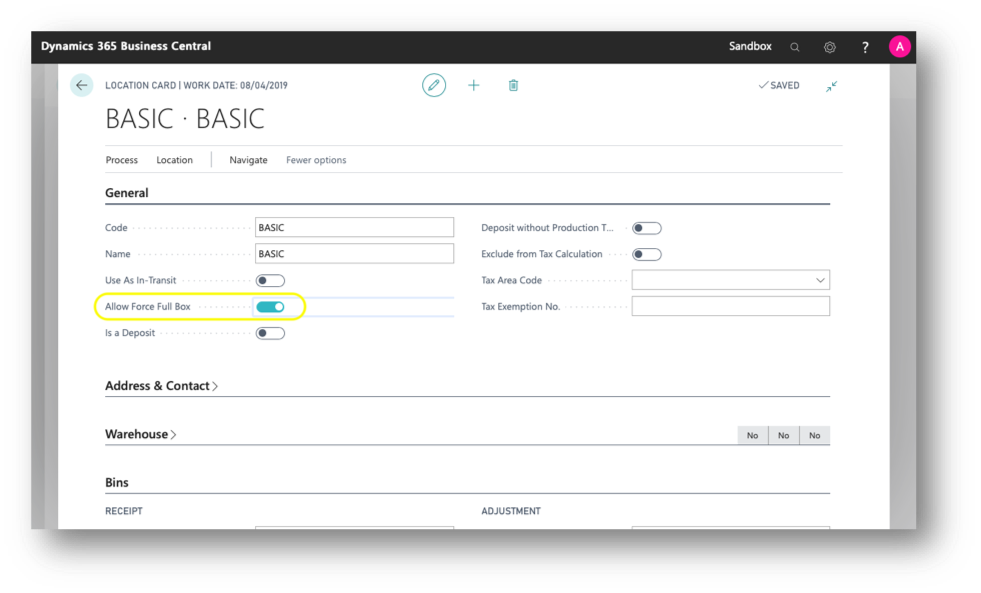
The following location will be configured as the one that later will be associated with the vendor (to which the transfers will be made). This location must have the following parameters:
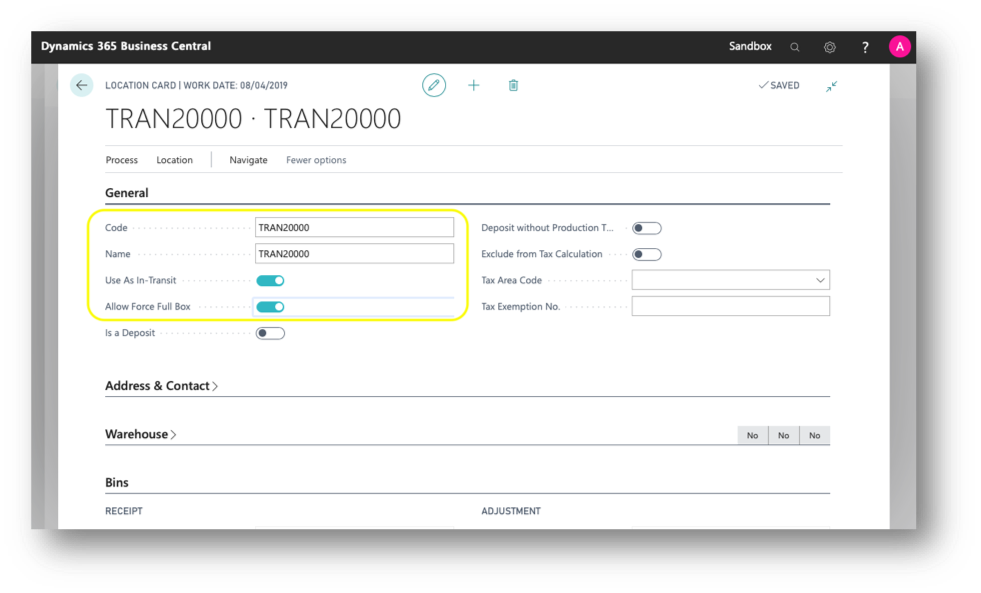
You must also configure a location that acts as a transit between the two warehouses to be used, whose parameters are reflected in the following screen:
For it to be possible for transfer orders to be genertaed automatically,it is necessary to define the transfer routes between one warehouse and another. This correlation is defined in the matrix in the transfer routes section. Thus, the warehouse previously defined as "transit" will be the one that acts between the two selected locations:
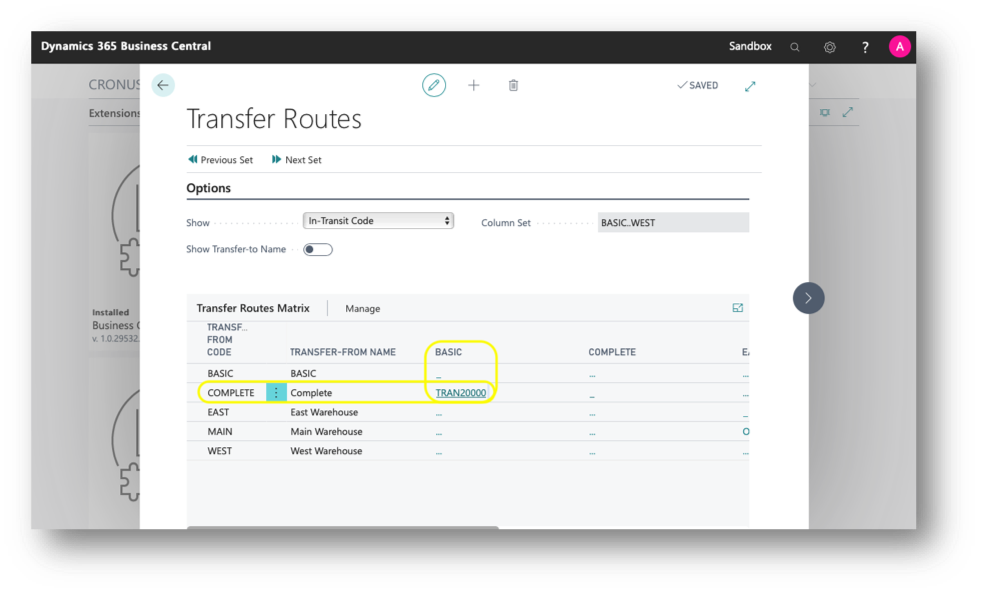
In this case in the example has been put that the transfer is made between the complete warehouse and the basic warehouse by means of a transit location called TRAN20000.
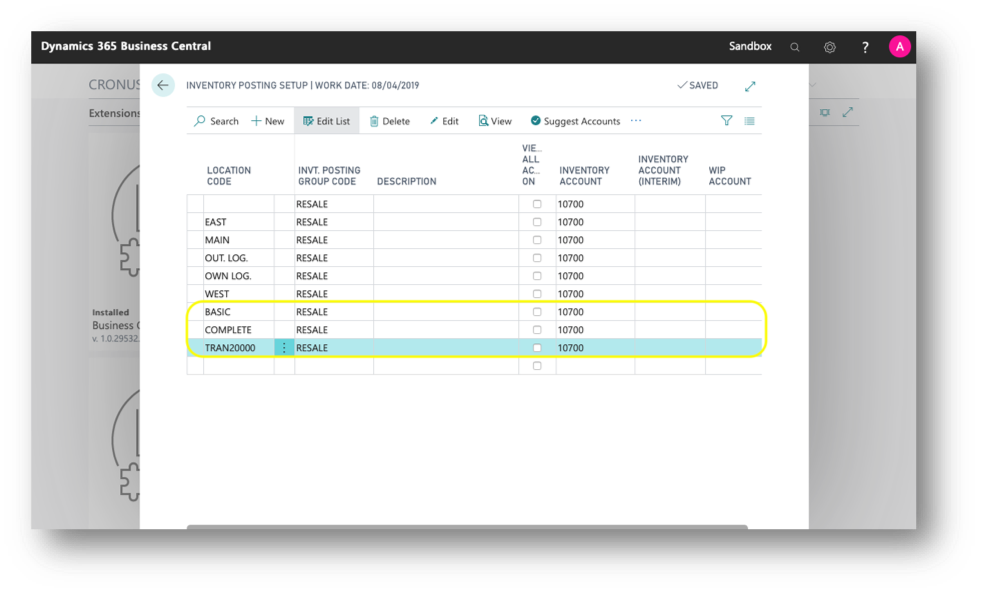
In the inventory posting setup we must add the new warehouses that we have just created:
Vendor Setup
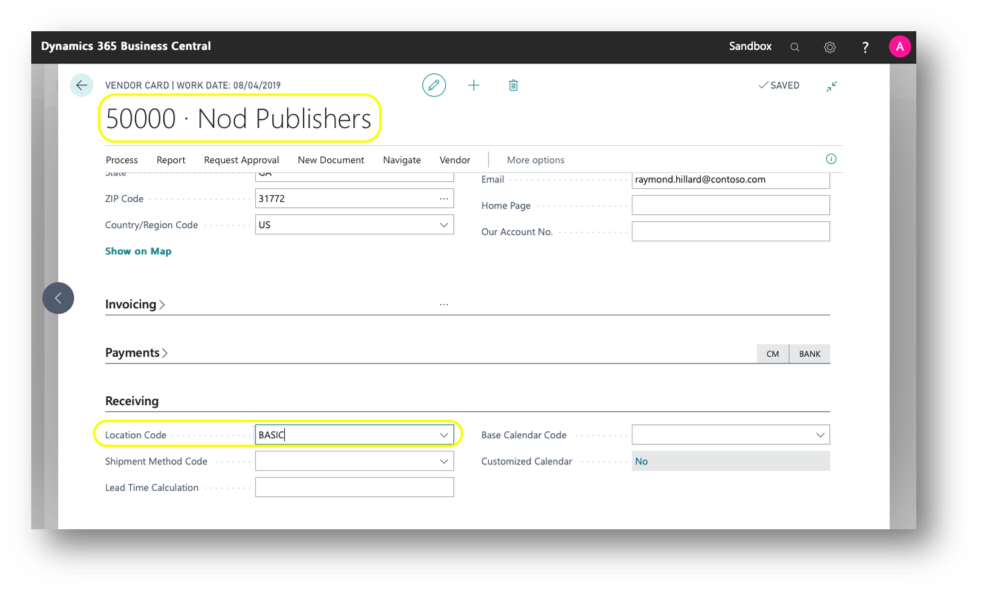
As mentioned above, the vendor must have a location associated with it. This location is the one configured in the previous step, so all that remains is to assign it to the vendor it is going to work with.
Inventory Setup
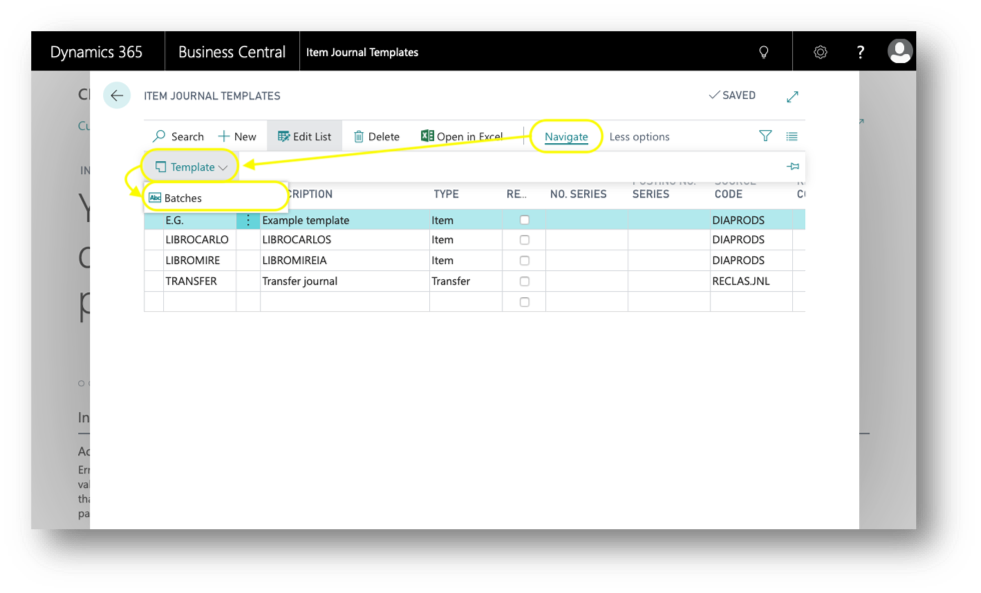
You must define the external manufacturing journal ledger and external manufacturing journal batches in the inventory configuration. The first think you do is navigate to the Item Journal Template section and create a new one.
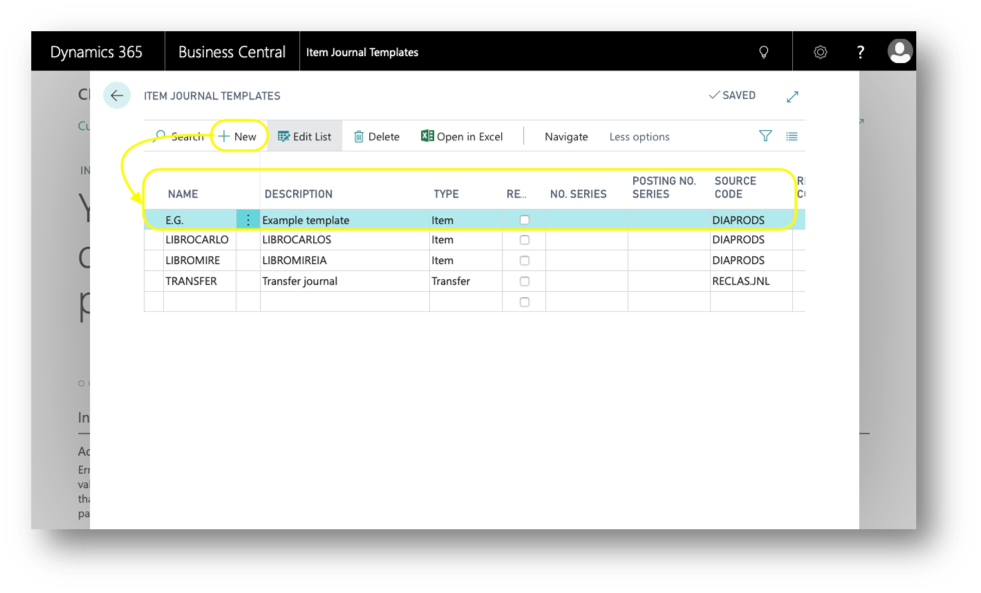
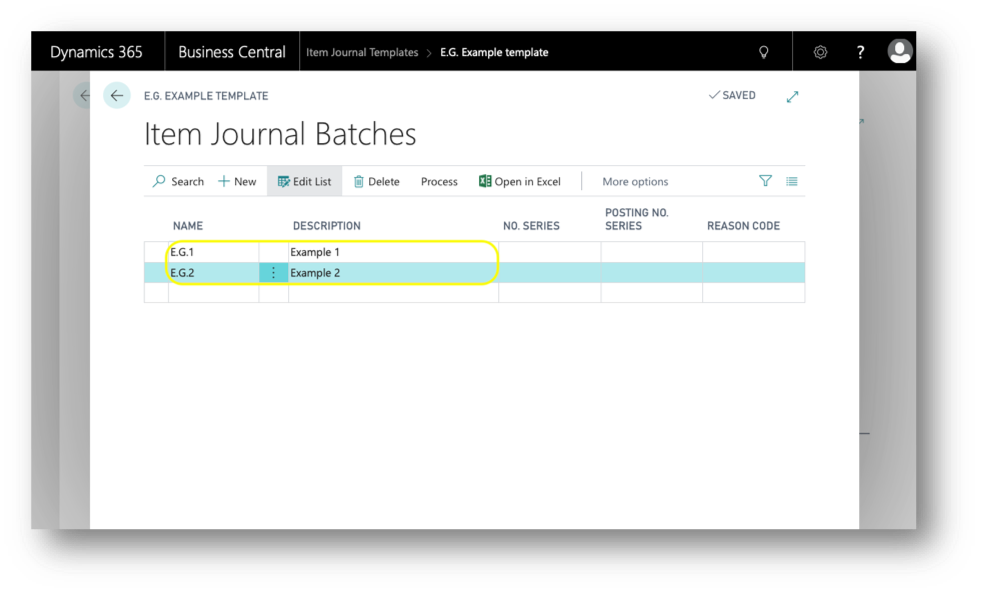
From there you must access to the batches section and create as many as you need.
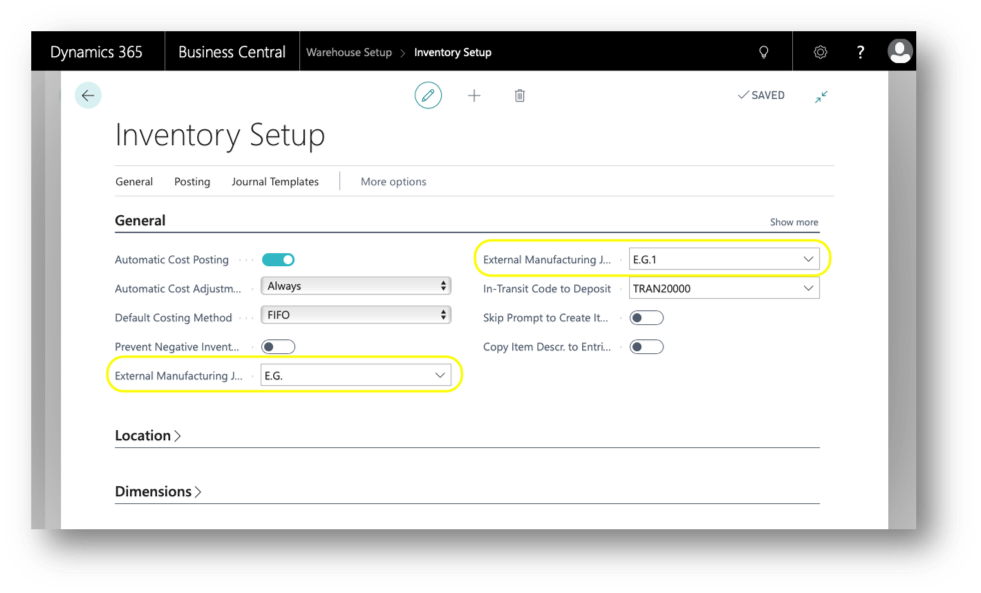
Once the diary and its batches have been configured, let access to the inventory configuration page and assign what we have created to the external manufacturing fields.
Warehouse Setup
As with inventory, for the warehouse it is required, first of all, to define the journal and the batches you want to use, so you must accesss the warehouse journal template page and define the journal.
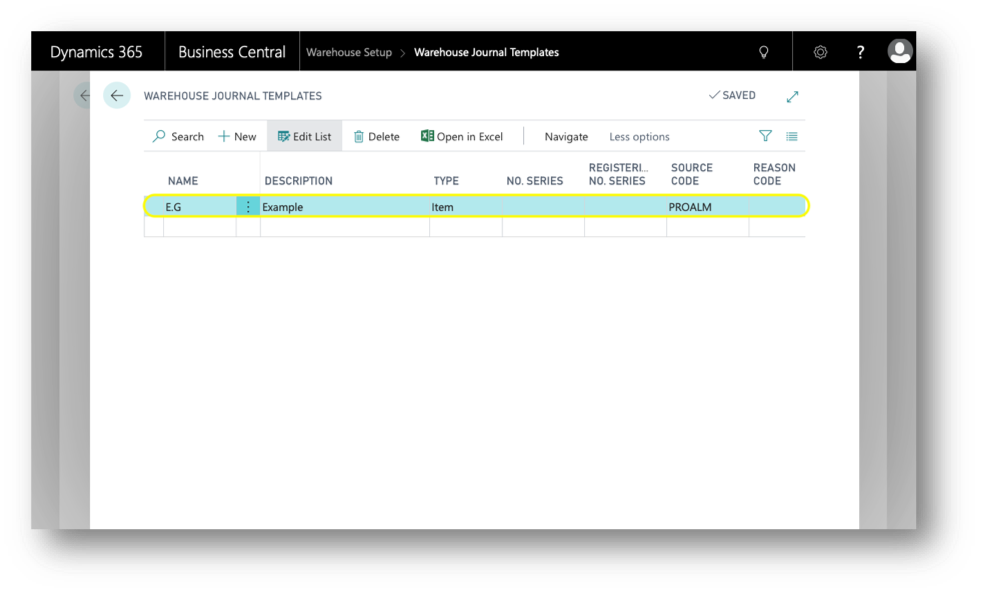
Once this is done, access the batches in the same way as in the previous section and define those that are considered convenient.
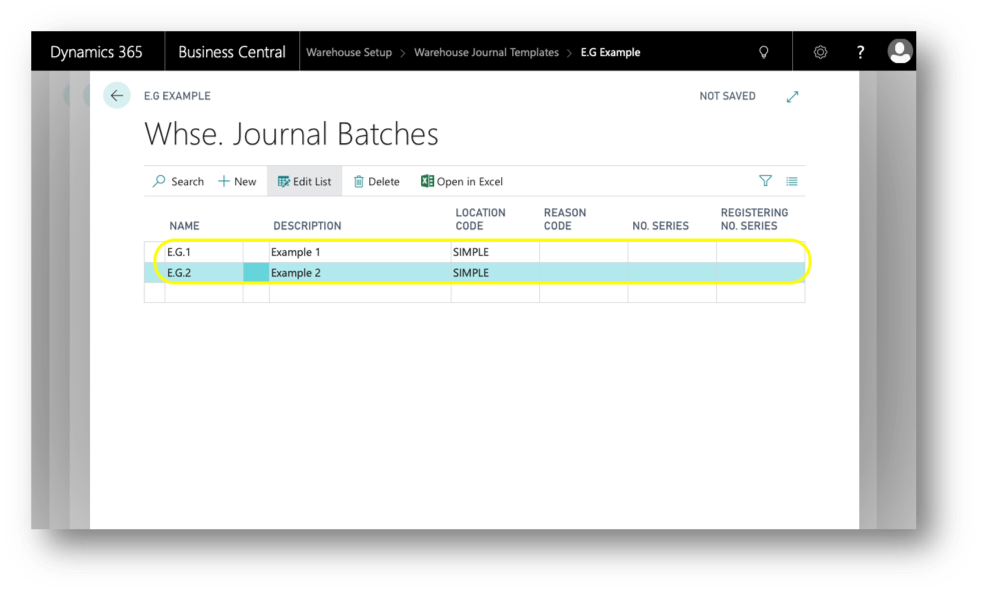
You access the warehouse configuration and assign the journal and the defined batches to the external manufacturing fields.
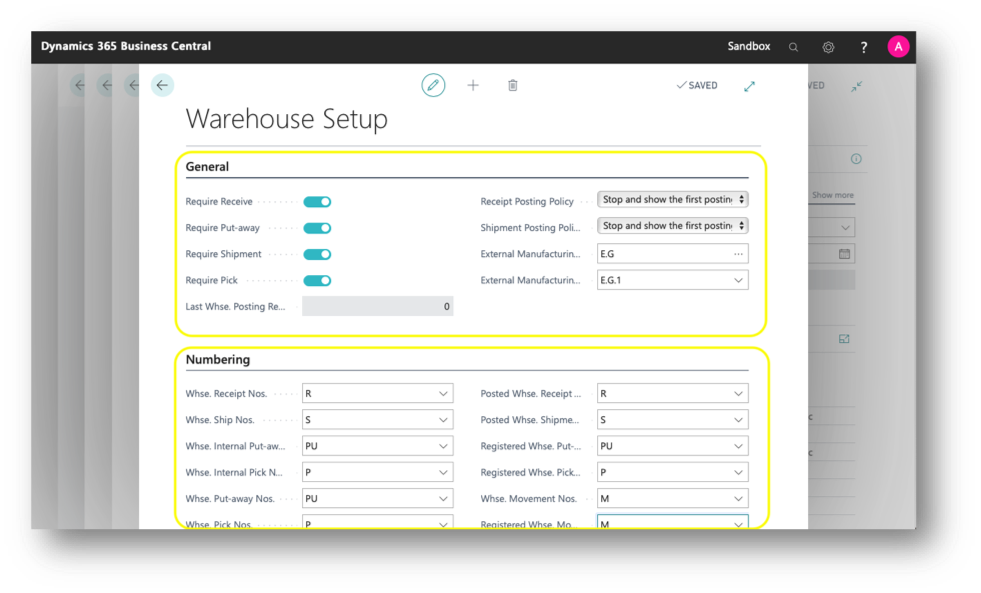
Note: remember to assign in the numbering section the necessary codes so that when generating receptions, shipments, etc., numbers and prefixes are automatically assigned to the new documents.
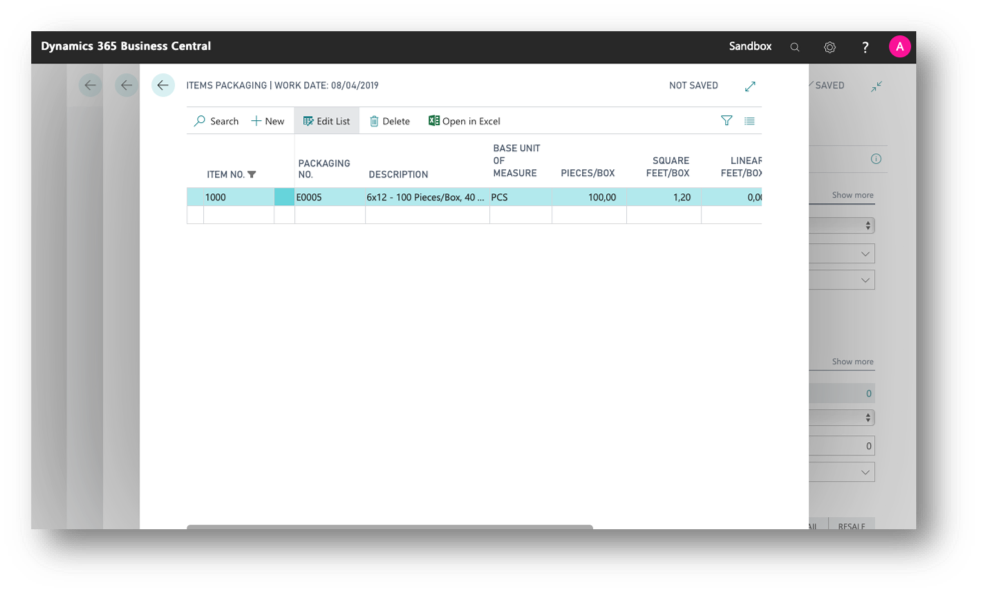
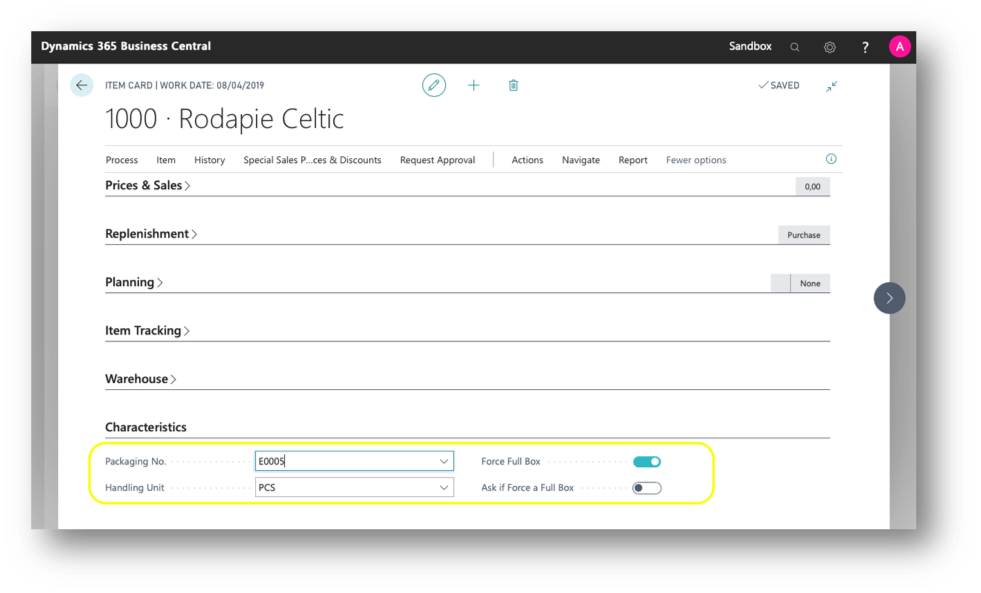
Items' Setup
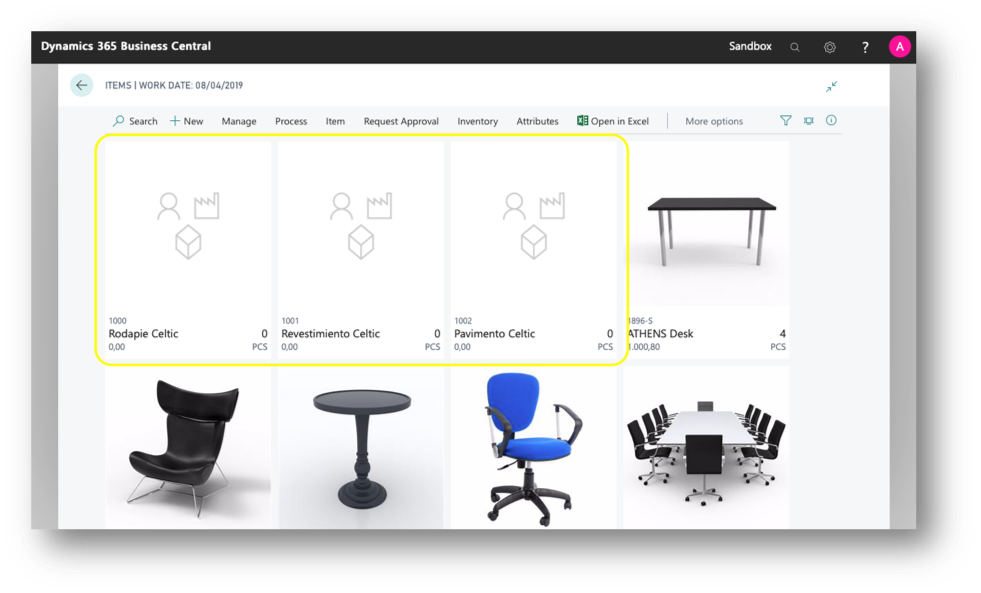
With this module we are going to deal with assembled items so in order to use this extension correctly you need items defined like that. In order to achieve it what is necessary is to access to the page of items and create as many items as it is wished. In this example, three products have been created: Pavimento Celtic, Revestimiento Celtic and Rodapie Celtic. The last one that is mentioned will be the one that has assembled the other two; therefore, if you make a purchase order or any other action, it will be the one that is put in the order (understanding that you want to buy those products that have assembled).
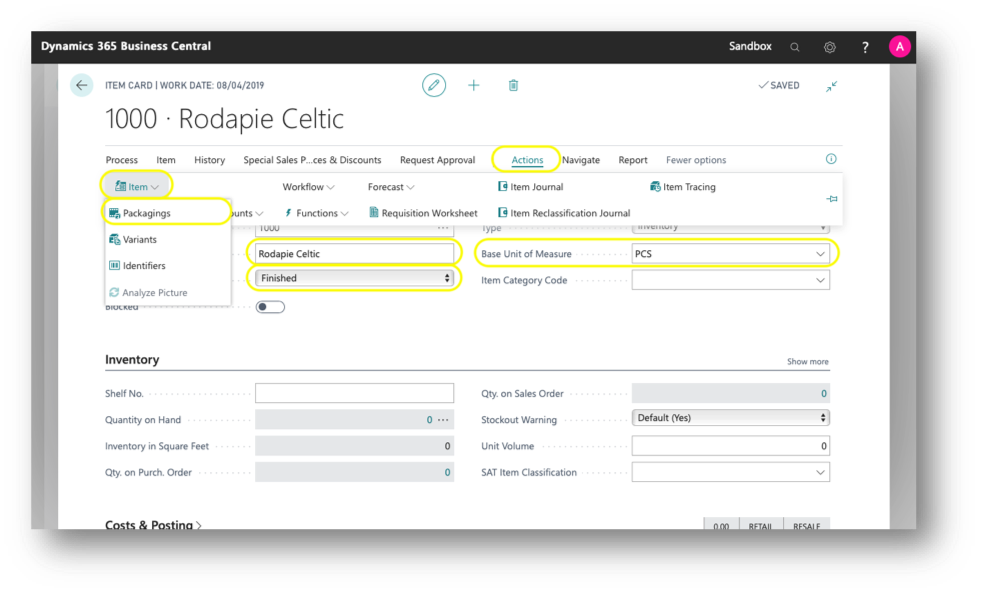
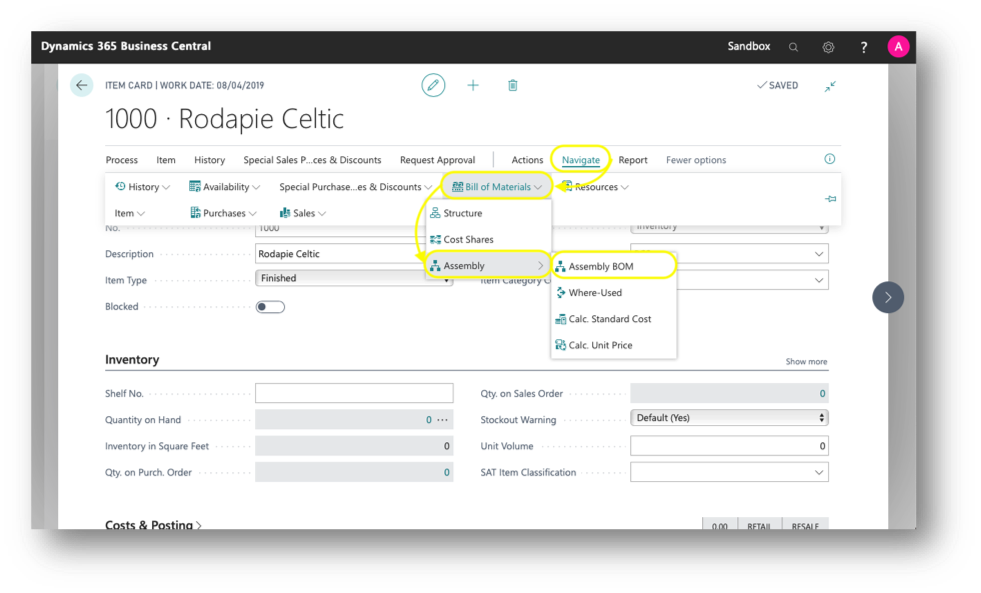
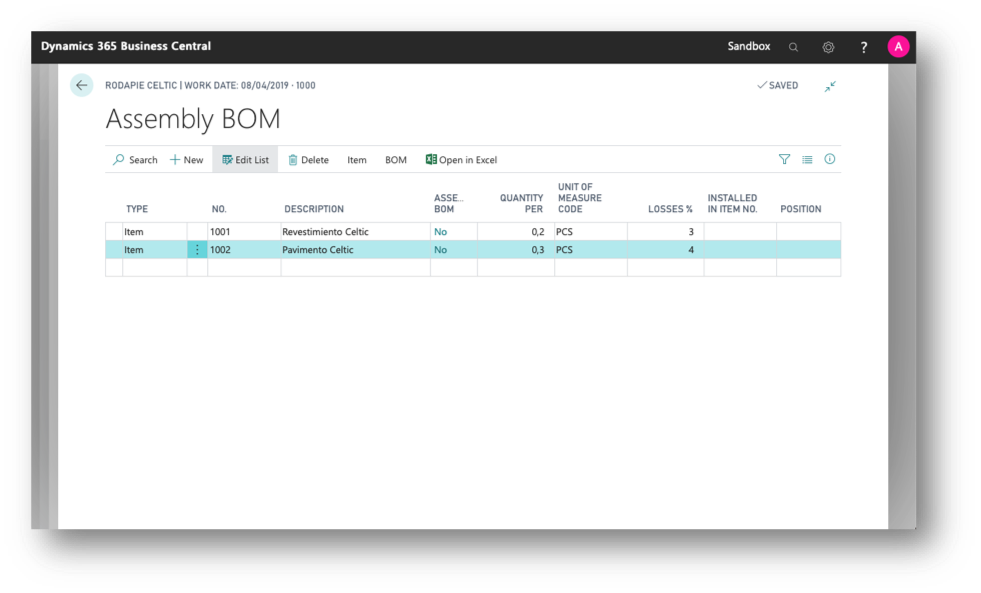
To carry out the assembly, access the "father" product page, in this case Rodapie Celtic, and assign the assembled products to it:
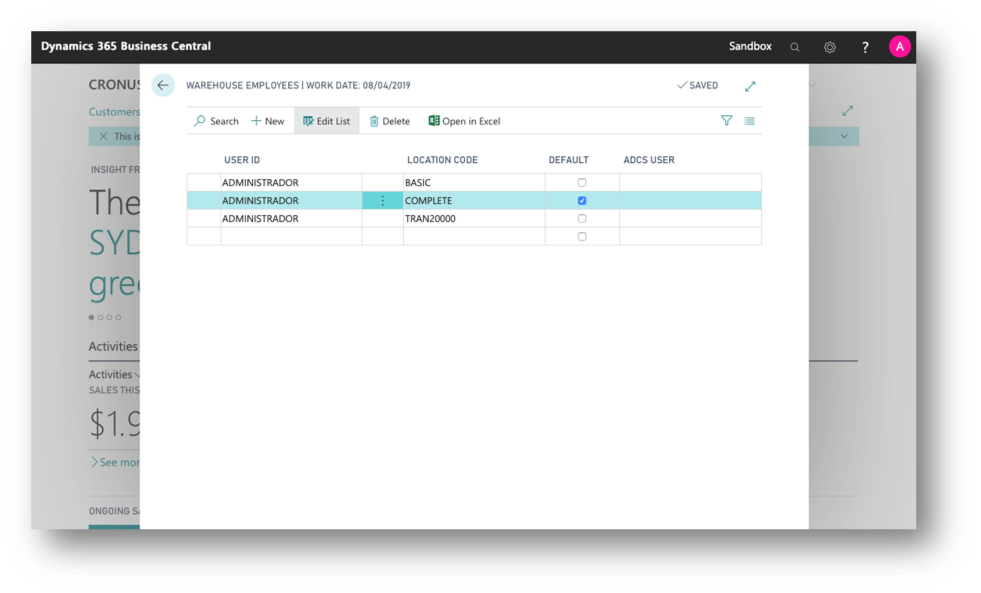
Permissions setup
Remeber that it is necessary to have the necessary permissions to act with the different locations. To do this, by accessing the warehouse employees screen, you can give the mentioned permissions.
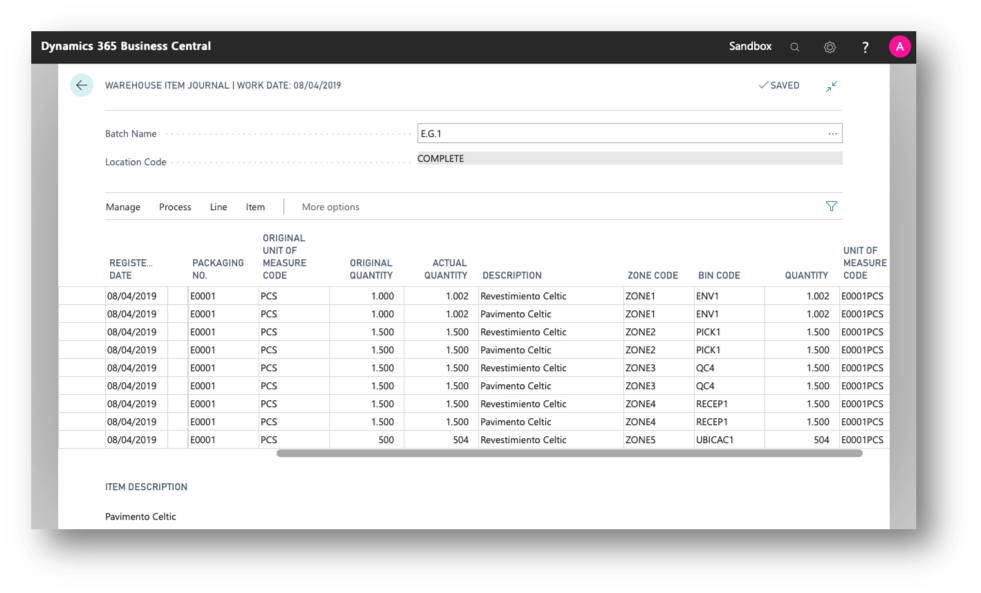
Stock
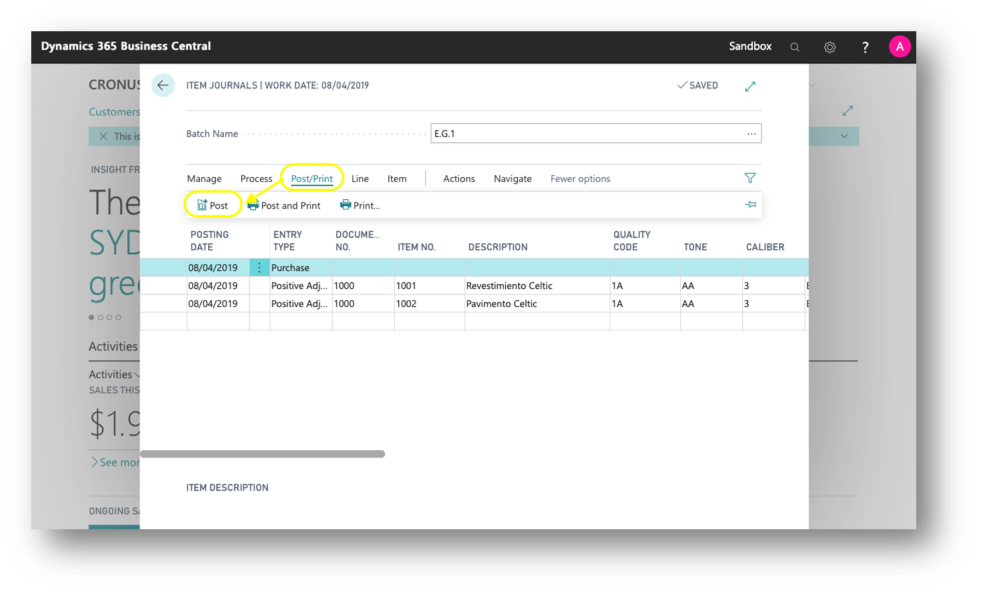
It is required to add stock to the items that are going to be used so accessing to the Warehouse Item Journal, add the componenets of the assembly and add the tone, caliber, location etc for each component:
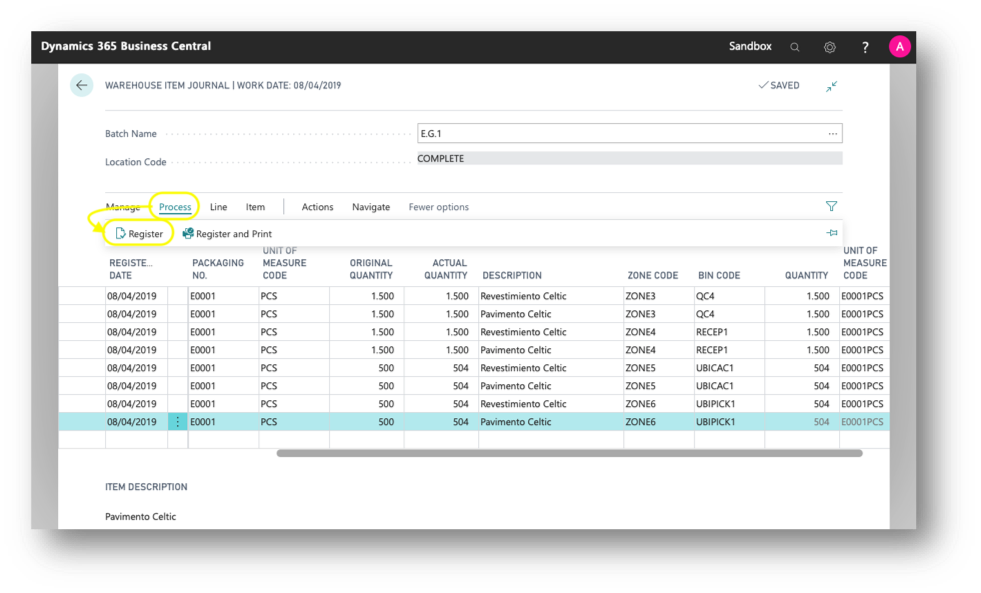
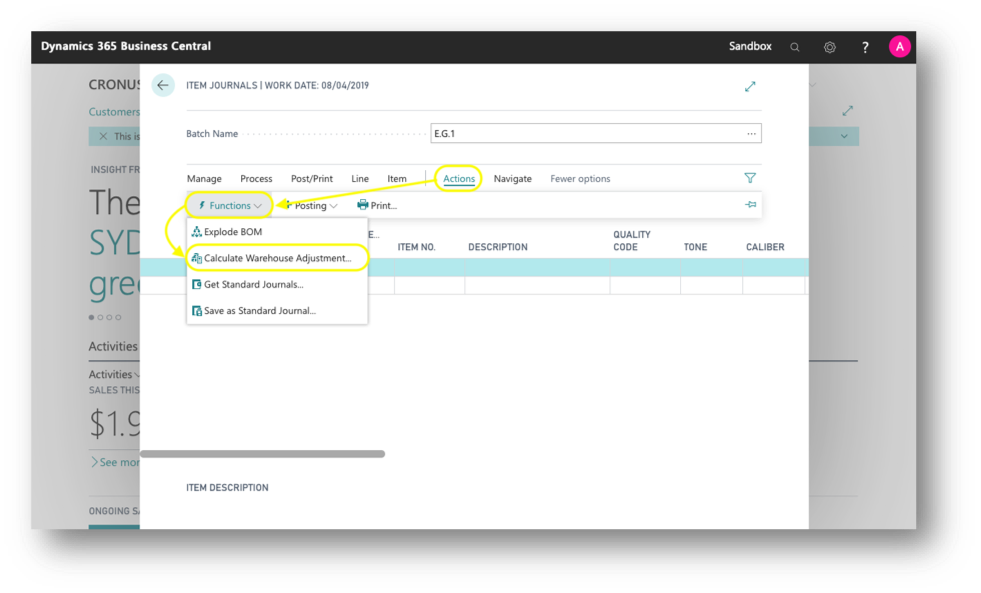
After registering it, it is necessary to go to the item journal where the adjustment must be done and he post
Support
For questions, you can reach us through our support platform at: http://soporte.aitana.es/